Showing posts with label spellbinders. Show all posts

Thursday, 21 November 2013

Christmas Tags

Hi Everyone,

Only a few days left on this month's blog challenge - Christmas Gift Tags.

Don't forget we need your entries by midnight on Monday 25th November.

Here is another gift tag sample made by Linda


She used the Couture Creations Ivy Doily set,


and layered on top the Spellbinders Poinsettia dies

which were stamped and embossed with the Just Rite Festive Poinsettia stamp set


We can't wait to see the rest of your entries!
Good luck!
xxxx Pin It Now!

Saturday, 9 November 2013

Crimson Cloud Christmas Blog Challenge - win an exclusive stamp set!

Hi Everyone,


Welcome to our second monthly blog challenge to win a Crimson Cloud exclusive stamp set.


As it is nearly gift giving time, the challenge this month is to create a Christmas gift tag.


The prize for two lucky winners is the Noel Bells  A6 clear stamp set which includes two step stamping elements.


If you would like to take part - please email your entry to mel@crimsoncloud.co.uk by midnight on Monday 25th November.

You can use any brand of stamps and dies you like on your entry - there are no restrictions.

And here is our pair of gift tags


made using the Spellbinders Mr and Mrs Snowman dies

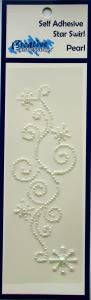
Creative Expressions Self Adhesive Star Swirls


and the Couture Creations Wild Holly embossing folder in the background


and the sentiment from the Crimson Cloud Holly Wreath and Bow stamp set


We can't wait to see your entries!
Good luck!
Mel xx
Pin It Now!

Monday, 21 October 2013

Hark the Herald Angels sing...

Hi
We are continuing with our Christmas theme this week and have been playing with the new Singles Christmas stamps from Creative Expressions.


I stamped and embossed Creative Expressions Herald Angel 


and inked over it with Wild Honey and Chipped Sapphire distress inks  to create an embossed resist effect.

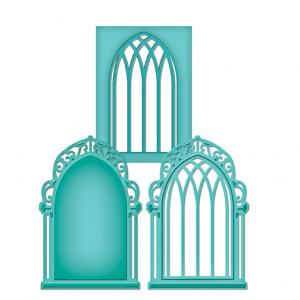
I used the Spellbinders Arched Window set of dies to frame the angel.


After stamping and embossing the sentiment onto vellum, I wrapped it around the front of the Arch and and attached to the spritzed card base.

Finally I decorated the card with some gems from my stash.

I hope you like it!
Mel xxxx

Pin It Now!

Thursday, 29 August 2013

Christmas Wreaths

Hi Everyone,
I thought you would like to see what you can do with the new Spellbinders Build a Wreath die set


This is a beautiful die set and makes fantastic dimensional wreaths for your cards and projects.

The main die cuts out the wreath base, and the smaller dies cut out branches which are inserted into pre-cut slots in the wreath base. And of course there is the beautiful bow which can be cut in any colour from a range of materials.

Here are a couple of samples using this fantastic set -


For this card, I cut the wreath from Kraft cardstock and blended some Walnut Stain distress ink to add more dimension to the branches. The sentiment is from the Crimson Cloud Elegant Stag and Sentiments stamp set


The wreath on the second card


is made from white card stock, coloured with Distress Stains.

To mount the wreath, I used a sheet of the Crimson Cloud Wood Veneer


I hope you like these samples and are beginning to feel a little of the Christmas spirit??
Mel xx Pin It Now!

Wednesday, 17 July 2013

New JustRite and Spellbinders Christmas stamp and dies range now in stock!


Check out the full range at http://www.crimsoncloud.co.uk/182-justrite

Mel xxxx Pin It Now!

Friday, 12 July 2013

Spellbinders Christmas 2013

It's that time of year again!!

And to help get us started, we have the new Spellbinders Christmas 2013 dies in stock.

Check out the website for the full range.

Next week the Just Rite Christmas range of stamps and dies that are being promoted on Create and Craft should arrive at Crimson Cloud - so keep your eye out!

Mel xxx Pin It Now!

Tuesday, 18 June 2013

Sparkling Poppies


This card was inspired by a technique I saw on YouTube, and works so well with the Spellbinders Die D-Lites Aster and Poppies die set

To create my glittering topper, I took three colours of glitter, a sheet of double sided adhesive and my Poppy die.

To start I die cut an oval from the double sided adhesive sheet, removed the front protective sheet to reveal the stickiness and set it aside (carefully and well away from my glitter!).

Taking my now die cut oval front protective sheet, I die cut the poppies from it. I now had a poppy shaped mask.

I lay this mask over my adhesive oval and covered the whole oval with blue glitter. Once I had pressed the glitter in I tipped the remainder back in the pot.

I now have a blue glittery oval with the poppy mask still attached. I carefully lifted the poppy "heads" up and trimmed them off, to reveal the adhesive underneath. I then applied my red glitter and tapped off the excess once again.

I now had only the stem and leaf mask left on the oval which I removed and used my green glitter to cover the remaining adhesive.

The card was quickly put together with a strip of patterned paper and a sentiment. I felt that the topper was so strong and striking that I did not want to distract from it.

I hope you like this technique and have fun with it - but be warned - you will be covered in glitter by the time you have finished!

Mel xx Pin It Now!

Wednesday, 5 June 2013

You bee-long together!

This week Linda has been playing with the Bee Sentiments


and Bee Backgrounds stamp sets.


These two stamps sets are great on their own but also work fabulously well together. They also coordinate with the Spellbinders Hexagon die set.


I love that Linda has not used the traditional yellow and black colours for these cards. And who can resist a bee-stamped ribbon!

xxxx Pin It Now!

Monday, 3 June 2013

Spellbinding Sequins!!!

Sequins are everywhere at the moment and now they are at Crimson Cloud


And joining the Sequins this week are the latest Spellbinders Die D Lites -


Check back soon for some more inspiration!

Mel and Linda xxx
Pin It Now!

Wednesday, 1 May 2013

Birds of a Feather .....

This card was made for today's CRAFT challenge.


The theme was sewing/stitches, and as you can probably gather from my submission - sewing is not my strong point!

To start, I took a white card blank and stamped it with the Hero Arts Arrows cling background stamp in Versamagic ink (Wheat). This ink gives a lovely subtle background.

I set the card blank aside to dry.

Using the new Hero Arts clear stamp set "Sundrifter Love This" I stamped the circle onto a strip of Kraft cardstock and embossed with white embossing powder. I stamped and embossed three feathers onto the circle to give the look of a Dreamcatcher.

At the top and bottom of the circle I stamped "you" and "me" in Memento Rich Cocoa.

To create the scalloped bottom edge I used Spellbinders Labels Thirteen.  I trimmed the Kraft cardstock slightly narrower than the die so that I could slide just the bottom of the card under the cutting edge and die cut it.

I took some scrap vellum and stamped and embossed my sentiment. I trimmed the vellum to fit the width of my Kraft panel. Using some repositionable glue, I positioned the vellum on the Kraft panel and poked some stitching holes with a piercing tool. I then used these holes to sew my vellum strip onto the Kraft cardstock.

To decorate, I used some twine, a wooden button and some 3mm white pearls from Creative Expressions.


I attached the panel to the front of the card with foam tape.

I hope you like this card, with its neutral colours I think it is suitable for a man or a woman.
Mel xxx


Pin It Now!

Thursday, 25 April 2013

New Spellbinders Die D-Lites now in stock!


Please note that due to a manufacturer quality issue with some of the D-Lites lines, the full range is not yet in stock. We expect to have the rest of the dies in stock from late May.


Best wishes
Mel and Linda
xxx
Pin It Now!

Friday, 12 April 2013

Rainbow Fairy with Alcohol Inks

This little fairy is from our new Fairy range - isn’t she pretty?


To make this card you will need:

Crimson Cloud Fairy Picking Flowers Stamp Set


Spellbinders Grand Nestabilities Large Labels.


Adirondack Alcohol Inks - Purple Twilight, Pool, Stonewashed, Lettuce

Alcohol Blending Solution

Stazon Black

Memento Tuxedo Black

White Card Stock 10” x 6” x two pieces

Clear Acetate Sheet

Button and Twine

Pearls.


Create your card base from white card stock and die cut an aperture in the front and back panels using the Large Labels die. Repeat with the second sheet of cardstock.

Cut out 2 pieces of acetate and stamp the fairy on one of them using Stazon Black. Make sure it is dry and turn over to paint your fairy using the alcohol inks. 

Put to one side and use the remaining inks on your palette mixed with some blending solution to paint diagonal stripes across the front of one of your card bases.

Attach your painted fairy acetate sheet behind the front aperture, and your other clear acetate sheet in front of the back aperture.

Glue the second die cut card base to the inside of the card - lining the apertures up. This will cover up where you have glued your acetate in place.

Stamp your sentiment using the Memento ink on the spare piece of painted white card stock and cut to shape.

Fix with a pretty button and some twine.

Now simply colour some pearls with the alcohol inks and stick them randomly.

When the card is closed you can see straight through it - my Granddaughter will love hanging this  up to her window.

Enjoy!
Linda xxx


Pin It Now!