Saturday 28 May 2011

Geisha at Sunset


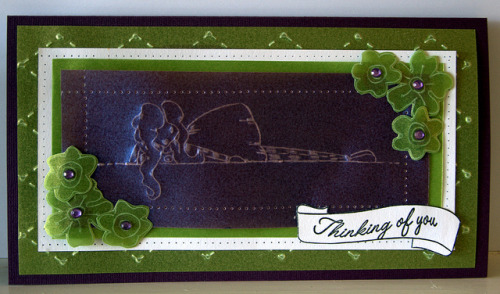
I hope you enjoy this example of using our Geisha digi-stamp which I painted with Cosmic Acrylic Drawing Inks. My colour choices were the Persian Shades and Nature's Essentials.
The fan, which is from our Oriental Die Cut Collection, has also been painted with the same shades. 
The Mix & Match Mountain Range, which comes as either an SVG file or a Stencil/Mask Kit, provided the backdrop. 

Finally a simple sentiment design from Creative Expressions Oriental 2 U-Mount set and were done.
Your comments as usual are always great to hear.
Linda xxx
Pin It Now!

Friday 27 May 2011

Grand Calibur Now In Stock

Great news - we have just taken delivery of the latest batch of Grand Caliburs. We have another delivery due early next week too so if you miss out this time around, just email me on mel@crimsoncloud.co.uk and I will reserve one for you. Pin It Now!

Sunday 22 May 2011

Song of the Sea


This mermaid silhouette makes a striking image against a moonlit background.
To create,  I cut out the mermaid on my Cricut using our exclusive Mermaid svg file.
Using the Hydrangea Big’n’Juicy ink pad, I brayered over glossy card using a moon shaped mask. As I had used A5 sized glossy card which is wider than the brayer, I did one side first, then turned the card around and brayered the other end, making sure the pink part of the ink pad met in the middle.
The impression of rocks from roughly torn black card ‘grounds’ her.
Thistle Stickles give her tail an amazing  effect  - make sure you leave it to dry for a couple of hours before you touch her again.
Once I had decided on the layout of the scene, I stamped the greeting (using Treasures of the Ocean stamp set from Creative Expressions).
The coloured strip at the bottom was made by scrunching up a piece of copier paper and rolling over it with an inked up brayer. As the brayer is soft, it picks up the texture of the paper. I then brayered over a strip of glossy paper, giving it the texture of water. I overstamped with small seashells (using Mermaid and Friends Stamp set from Creative Expressions).
Using the Hydrangea ink pad again, I painted the shells to make them pop out and bring all of the colours of the card together.
Once my mermaid tail was dry, I secured her torso firmly to the card and allowed her tail more freedom to give a 3D effect then layered in coordinating colours.
Hope this gives you some inspiration! x
Pin It Now!

Tango Silhouette


Silhouette toppers are deceptively versatile. You can either cut them out on your digital die cutting machine (like the Cricut) or buy them ready cut.
I love the dancing shows that are always on tv at the moment, so for this card I chose an image of my favourite dance - the Tango! 
Although my first instinct is to cut a silhouette out in black, I thought it would be fun to see what I could do with different colours - and of course red is definitely the colour of passion - ideal for the Tango.
Once I had cut out the dancing couple, all I needed to do was die cut the circles and scalloped circles (using Grand Nesties) and mat and layer the shapes. I added some texture by embossing the black circle with the Floral Embossing Folder from Creative Expressions.
I needed something else to complement the dancers, so I die cut some swirls and Carnation Creations from Spellbinders for the flowers.
I kept the colours simple, just black, red and white so that the eye is drawn to the dancers.
This is a fun card and ideal for any fellow Strictly lovers!
Let me know what you think x
Pin It Now!


Tatty Button is everywhere at the moment – and I am so enjoying her. She is a great character, most times cute but can just as easily be sophisticated or even naughty.
For the card above, I have stamped her in a pale ink on vellum. Once the ink was dry, I went over the outline lightly with an embossing tool. This stretches the fibres of the paper. When you turn the vellum over you will have a raised image in white.
The same technique created the flowers.
For the border around Tatty Button, I used the Tim Holtz Design Ruler which has evenly spaced holes along the edge to pin prick in straight lines.
I hope you enjoyed this example and have fun creating other ideas for her.
Let us know?
Pin It Now!

Welcome to the Crimson Cloud blog!


Hi,
Welcome to Crimson Cloud and my first blog. Please be gentle with me! The goal is to be able to share our, and your, ideas, designs, and a few technique tips.
Crimson Cloud by me (Mel) and my Ma, Linda, operates with a north/south divide - hemispheres that is. Whilst my Ma sits in the sunshine of South Africa gazing out over the lake dreaming and designing, I sit huddled around a radiator in my craft room in Sussex. Whilst I am getting excited about a couple of day’s of sunshine. She is complaining that it is too hot!!
Our styles of carding and crafting are equally different so hopefully you will find something to inspire you. It is also an opportunity to share our favourite products that we love and have enjoyed using in our own card making and projects.
If you also have favourites and ‘secrets’ to share or just feed back, it would be great to hear from you.
Till then, enjoy!
Melanie
Pin It Now!