Saturday 28 July 2012

Carnival Time!


Gaudy colours always remind me of carnivals and carnivals remind me of some of the amazing masks used.

This is our amazing mask from the Crimson Cloud Venetian Mask Set. I have paired up with some very precious paper which I brought back from the UK.

Here’s how:

Stamp the mask and the sentiment from the same set with Versamark onto a sheet of shocking pink card stock and heat emboss with black embossing powder. Using a Versamark pen, I filled in the tear drop and embossed with the black embossing powder to give the mask a stronger image given the strength of the background.  I also used a few ‘jet’ beads’ for the same reason.  

I mounted the mask and sentiment onto to a Grand Callibur Scalloped Circle die cut using some mounting foam  and decorated with some pretty ribbons and a couple of Creative Expressions black hat pins.

I made a basic 8 x 8 inch card in black card stock and matted some striking patterned paper onto it.

I cut out an extra flower from the patterned paper and used it as an embellishment at the bottom of the card to create dimension.

Does it put you in the mood to carnival?

Linda xxx

Pin It Now!

Thursday 26 July 2012

Stitching Challenge submission

This week we had a Guest Designer spot on Trimmies Craft Challenge.  The theme was stitching - not my strong point!!

Here is my submission

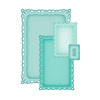
I cut the nested frames using Spellbinders Romantic Rectangles


cutting the largest from cream cardstock and the smaller from patterned paper. The largest rectangle die has a pin-pricked edge so I used this to hand stitch all the way around - it took forever but I think it was worth it!

The sentiment and ornate frame was stamped using the Just Rite Vintage Floral Labels stamp set


and die cut with the coordinating Spellbinders Labels Thirteen die

I dyed some American Seam Binding 
with Pumice Stone Distress Ink to match the patterned paper and tied it around the topper.

I embellished the bow with one of the new Creative Expressions Circle Dazzlers
Once I had matted the topper onto the card base, I added a couple of hand stitches to two of the corners as little embellishments.

Hope you like it!
Mel xxxx Pin It Now!

Tuesday 24 July 2012

Pre-order the latest Spellbinder releases

The latest Spellbinders dies are now available for pre-order at www.crimsoncloud.co.uk.
Check out the "Coming Soon" section for these and many more dies!


This is just a taster of the range we have on order - I can't wait for these to arrive!!
Mel xxx Pin It Now!

Monday 23 July 2012

Ascension


I was inspired to make this card for my nephew who has been through a very rough time for the last few months. Now he has recently become a new dad and it’s his birthday so I hope this lifts his spirits.

This how I made it:

With the Couture Creations Ascension embossing folder 


I embossed 3 sheets of white card and one in the turquoise. 

I then cut out the 3 white largest balloons to decoupage. I used a promarker pen to highlight the lines on the balloon but it would work just as well with an ink pad if you don’t have the patience or the right colour pen. I used the Broken China Distress Ink Pad to highlight for the edges as there are some limits to my patience!

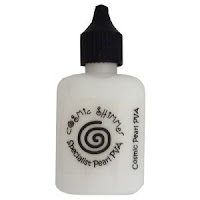
 Once I had decoupaged the layers up I then had fun with Cosmic Shimmer PVA Teal Sky 

making little pearls all over the balloon. 

The basket I actually painted with the glue to get the draped effect, but you must work quickly for this part!

 I didn’t have a tag that was big enough, to take the sentiment, so I cut rectangles in different sizes and layered them up to emphasise the 3D effect. 

A few more pearl dots I thought and some fancy string and then I was quite happy with the result.
What do you think?
Linda
Pin It Now!

Saturday 21 July 2012

Create Your Own Summer


This card is so fresh and full of the sights and colours of summer and best of all it’s easy to make.

Using the same method as our last triple easel card, you can create your own summery card just by changing the paper and dies that you use.

You will need:
1 sheet of Foundations Paper Dot and Dash in Red and White 
1 sheet of white card stock
1 sheet of red card stock
Creative Expressions- Sincere Sentiments ‘Sending you Sunshine, Laughter and Hugs’
Spellbinder Hearts Circles

Spellbinders Rose Creations

Spellbinders Fanciful Flight

Spellbinders Foliage


Brilliance Pearl Poppy Ink Pad

Crystal Embossing Powder
2 Brads of choice.

Now fold the Dot and Dash in half vertically and place the three largest dies just on the fold so that they hold together when you die cut them. 

Open your largest folded Heart circle, and score and fold one panel in half to create an easel card base - this will be the anchor for your cards.

Cut out your flowers, foliage and small butterfly from the scrap and save the little hearts that fall out from the big circle.

From the white card stock, cut out three further matching Heart Circles to mount on your folded paper ones.

Cut out the large butterfly from a piece of red card stock whilst it is in the die colour through the die the parts you would like to be white with a white pen. 

Now ink the whole die cut butterfly with Versamark and emboss with crystal embossing powder. 

Use the Pearl Poppy ink pad to stamp your sentiment onto the large white Heart Circle and mount onto the largest heart circle mini easel. 

Layer up the remaining white card heart circles onto the two smaller mini easels.

Arrange your flowers, foliage and butterflies using a brad for the centre of the larger flower before you glue and some Cosmic Shimmer Pearl to decorate the smaller butterfly.

For my last and smallest flower I used some of the scrap to die cut the smallest heart circle.

There - I told you it was easy. Enjoy!
Linda x
Pin It Now!

Friday 20 July 2012

Fleur De Lis Butterfly triple easel


Take it from me - this intricate card is much easier to make than it looks - which of course is the secret!!!!

Take an A4 sheet of light cardstock and fold it lengthwise. Now line up three Spellbinder Fleur De Lis Squares dies (in decreasing sizes) so that they are just over the edge of the fold. This will keep them joined together when you die cut them.
Next cut the same three Fleur De Lis squares out of card stock in the same colour. Then you need to cut three plain edged squares to fit just inside. Emboss these plain squares with the Creative Expressions Flourish embossing folder and layer onto the Fleur De Lis squares.


Open your largest folded Fleur de Lis square, and score and fold one panel in half to create an easel card base - this will be the anchor for your cards. Attach your largest square to the folded panel. You have now created the first part of the triple easel.

Repeat this twice more with your two smaller sizes so that you have three mini easels in decreasing sizes.

Choose your embellishments and sentiments to decorate each of the mini easels.

My sentiment was from the Just Rite Forever Friends cling stamp set


I chose the butterfly and dragonfly from the Spellbinders Fanciful Flight die set 


and the leaves from the Spellbinders Foliage die set
The little gold rose comes from a pack of Crimson Cloud Roses


Stick each easel base to the one behind lining them up as you go. With Nestabilities this is easy as they are all proportionally to scale. 

Add your embellishments and get busy with your pearly glue

to bring a little more femininity and decadence.

I hope you enjoy making this delicate and intricate card. 

Linda xxx
Pin It Now!

Wednesday 18 July 2012

Dance like no one is watching

This card was created using the new gorgeous stamp set from Creative Expressions - At the Ballet.

The sketchy ballet dancers are perfect to make cards for older and younger ladies alike.

I created an 8x8 inch card base in black and dotted the white Pearly pva glue around the edges and set aside to dry.

Taking a white 7x7 inch sheet of card, I chose two of the dies to fit my ballerina and sentiment from the Spellbinders Labels Six set.
Arranging the two dies onto my card, I ran them through the Grand Calibur. Then, keeping the dies in place, I embossed the card with the Adagio embossing folder - running it through the machine twice to cover the width of the card.

Along the bottom strip of the card (which has not been embossed), I stamped a row of ballerinas in clear Versamark. I embossed them with clear powder to create resist.

I covered the whole sheet with Spun Sugar Distress Stain

which highlights the embossing and the ballerinas.

Taking the Spellbinders labels again, I cut and mounted frames for the ballerina and the sentiment, embossing them with the Creative Expressions Floral embossing folder.

Taking another sheet of white card, I laid the die cut sheet over the top and marked in pencil the position of the two apertures.

Once the two images were stamped in the apertures, I positioned the dies and used them as a stencil to blend Spun Sugar distress ink around the edges.  I mounted this sheet behind the embossed card using foam pads to give dimension.

After layering onto the card base, I decorated the front with the Creative Expressions Gem Swirls

and Zipper Roses


Hope you like it and enjoy playing with ballerinas!
Mel x

Pin It Now!

Monday 16 July 2012

Big and Beautiful Scalloped Ovals


These Grand Nestabilities once again make a quick and dramatic card.  One to make when you do not feel like challenging yourself, or simply need to come up with a card quickly.

Out of the centre of an A4 sheet of cardstock (I chose this amazing aubergine colour), I cut out a size 3 die from Grand Nesties Scalloped Ovals

The remainder of the page I dusted with talcum powder and stamped with the Hampton Art dragonfly 

using Versamark and embossed with Cosmic Shimmer Lapis Black, which is fast becoming my favourite as it turns slightly green and iridescent. I cut the sheet in half through the centre of the oval aperture to create the "doors".

Then from a contrasting cream colour I cut out sizes 4 and 2 scalloped ovals from the same sheet. One for the stamped layer inside and the other as a frame for the front of the card. I cut the frame in half down the centre and attached to the "doors". With a low tack tape I stuck the two doors together to keep them in place while I fixed them to the card base. 

I stamped a scene used one from my own collection onto the cream scalloped oval using Encore Silver Metallic ink and embossed with Cosmic Shimmer Silver Shine Metallic Powder

I used Cosmic Shimmer Watercolour Paints, my old favourites, in Rose Hue, Holly Leaf and Orange Sunrise which mixed with the green gives a limey green for a little light variation. 

I matted the scallops to the card base and used a couple of pretty brads which look like buttons when the card is closed.


There you go quick and easy, sometimes it has to be - right?
Enjoy Linda xx
Pin It Now!