Tuesday 25 October 2011

Elizabeth Silhouette


Hi -
I needed to make an elegant card for a an elegant lady - and this stamp from Clarity Stamp could not be more elegant!

This is Elizabeth 


- and she is a beautiful silhouette stamp. I stamped her in black ink and cut her out.

Using some silicon glue to give her some dimension, I matted and layered her up on patterned paper using Spellbinders Nestabilities Labels Twenty and Fourteen which give a lovely frame.


I inked around the edges of the frames to add dimension.

I used the American Seam Binding ribbon


and dyed it yellow using the Mustard Seed Distress Ink:


I rubbed the ink pad onto my craft sheet, spritzed with water and dabbed the ribbon into the ink on the mat. A quick blast with the heat gun and it was ready to go.

I attached a strip of left over ribbon to a length sticky tape, leaving some tape sticking out the bottom. Holding onto the tape, I rolled the ribbon up to create a ribbon rose. I attach it to the card with two of the Crimson Cloud handmade black paper roses:


I used two of the Bird Flourishes Spellbinder dies to create the swirls behind the flowers:


To finish the card I decorated with some of my own buttons and pins.

Hope you like her!
Mel x Pin It Now!

Wednesday 19 October 2011

Party Time


I have been having fun playing with all the latest Spellbinders dies. They have such a wide range now that you can really mix and match them.

We also now stock the Foundations paper range from Creative Expressions. They are in lovely crisp, vibrant colours but can easily be muted down with your Distress Inks to give a completely different look.

I started off with one of the newest Spellbinder dies - Retro Mod Clocks.


At first glance they lend themselves to male cards, but I wanted to go in the opposite direction and make a really girly card with them. I cut out one of the clocks and clock face in white card and inked them up in pink. Then I decided to make corner accents using one of the separate clock hand dies, cut out eight times from pink cardstock.

To create the frame behind the clock and the frames for the sentiment, I used the Twisted Metal Tags and Accents die set.


For the background, I took a piece of the Dot and Dash Foundations paper (cerise).


I used the Dash side for the top half of the card and the Dots on the reverse for the bottom half.

To make the sentiment really stand out , I took a strip of white card, and covered it with a strip Sheer Woven Rosettes ribbon

 which gives the card real dimension.

Once I had put the card together, I added a few pearl embellishments

and finished off by "dotting" around the edges with a white pen.

Hope you like it
Mel xxx Pin It Now!

Wednesday 12 October 2011

Nature Gives to Every Season....

This Autumnal card was made for the upcoming C.R.A.F.T blog challenge.

The background was made using caramel, lettuce and rust colours from our alcohol inks range:

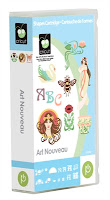
The oak leaves and acorn swirl came from our beautiful Art Nouveau Cricut cartridge:
I cut all the layers out at 6 inches in various shades of brown and green card and then layered up.

I stamped the sentiment, then die cut it using the Spellbinders Nestabilities Labels Fourteen

Before taking the shape out of the die, I blended distress inks around the edges:
The card was then matted and layered up onto a 6 inch square card and decorated with some faux pearls.


I hope you  like it!
Mel x


Pin It Now!

Sunday 9 October 2011

Creative Expressions Lattice Embossing Folder


If you are trying to get hold of the Creative Expressions Lattice Embossing Folder, we have plenty in stock at www.crimsoncloud.co.uk.
xxxx Pin It Now!

Thursday 6 October 2011

Venetian Mask


Whilst the whole world is debating doom, gloom, hard times and recession.  I have been busy making die cuts to lift our spirits. Try this amazingly decadent, mysterious and romantic Venetian Mask.


I dusted it with an anti-static pad then used a Zig Glue Pen 


to doodle a design emphasising the shape and features. I used the glue pen instead of the usual Versamark embossing pen as it allows me to draw in finer detail.

Cover with Creative Expressions Lava Black Aurora Embossing Powder and heat.


Now comes the really satisfying part of embellishing with your favourite gems and pearls. You could use Cosmic Shimmer Watercolour Paints which if applied heavily enough dry like jewels. In fact this is how I decorated the corners. 

I made the handle from a manicure stick - spray with semi-permanent glue, and roll in embossing power (which I had placed in the centre fold of a piece of A4), heat and there you go.
Have fun and enjoy,
Linda
Pin It Now!

Wednesday 5 October 2011

Yes, Virginia....

I made this card for the November edition of Craft Stamper which is out now.

The theme was to make a Words the main focus of the card, with a black, red and mustard colour scheme.
I thought this was a very unusual colour scheme, and at first I struggled but I am please with the end result.

The word stamp used is the Penny Black - Yes Virginia:

I think it is a really lovely sentiment.

I matted and layered the sentiment using Spellbinders Labels Twenty dies:


The flowers were made using the Spiral Rose svg. You can make two types of roses from this svg:

If you do not have a digital die cutting machine, we also sell the Spiral Roses as a pack of die cuts:

Once the card was matted and layered, I decorate the edges with the Spellbinders Elegant Posts:


 Hope you like it!
Mel x


Pin It Now!

Tuesday 4 October 2011

Forest Trees

We have recently added some new die cut packs to Crimson Cloud - especially for making Christmas cards. Included in this new range is a pack of 8 x Forest Tree die cuts (4 each of two designs).

I have used one of each design on this card:

These come in a pack, die cut from Vintage Green card.

To start I masked of the bottom of the card to give a snow effect, and inked the sky with distress inks. By using a circle mask I created a moon. I flicked water across the inked area to give the impression of falling snow.

Then I stamped across the moon with the Santa and Sleigh from the Clarity Stamp Christmas Miniatures Set of clear stamps:
I attached the two Forest Trees die cuts and added a little glitter glue:


 to look like snow.

The stamped greeting is from Penny Black:
To finish off the card, I used some Creative Expressions Wrinkle Edged Ribbon:
Hope you like it!
Mel x Pin It Now!