I am in the midst of making my Christmas cards using our newest set of Christmas stamps.
This card is very Sue Wilson-stylee - quite simple but luxurious.
To start I took some pink cardstock, and used a corner rounding punch.
Laying the largest die from the Spellbinders Persian Motifs
onto the card, I ran it through the Grand Calibur using the embossing plate and mat. This embosses the snowflake-like shape into the card stock without cutting it.
I stamped out the Elegant Stag and stars
onto a die cut circle and mounted onto the centre of the Persian Motif with foam pads.
Using a lot of patience, I laid the Creative Expressions Gem Swirl
across the centre of the card - only pressing it into place once I was happy with the position of the swirl.
Once I had stamped out the sentiment I mounted the panel onto the card base.
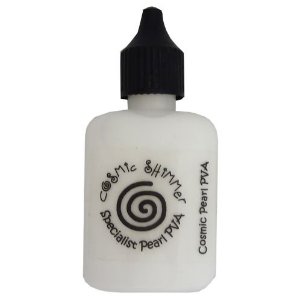
The outside edge of the card was embellished using Black Pearly PVA glue.
I placed the larger dots first, then randomly filled in the gaps with smaller dots and left to dry overnight.
Mel xxx
Pin It Now!
Showing posts with label gem swirls. Show all posts
Wednesday, 8 August 2012
Elegant Stag
Labels:
christmas,
Creative Expressions,
gem swirls,
pearl glues,
pearl swirls,
pearly glue,
persian motifs,
reindeer,
spellbinders,
stag
Monday, 6 August 2012
Friends
This is the last in the Ease of Embossing series which appears in this month's Creative Cardmaking.
Pin It Now!
To make this card you will need -
Creative
Expressions Thoughtful Sentiments Stamp Set
Vintage Ribbon - Eggshell/Teal
Creative Expressions Black Gem Swirl
Vintage Ribbon - Eggshell/Teal
Creative Expressions Black Gem Swirl
White/Teal Cardstock
Memento black ink pad
Button
Button
Instructions to make:
Fold some white card stock in half to create your card blank and trim to
5 inches wide.
Stamp the sentiment and emboss the bottom 2 inches of the card with the
Seedling Nouveau embossing folder.
Emboss a strip of white card and mount onto a slightly larger strip of
teal card.
Mount onto the front of the card with foam tape.
Take a length of white and teal ribbon and tie around the card in a bow.
Die cut two flourishes from the Bird Flourishes die set and adhere
behind the bow, then decorate with hat pins and a button.
To finish, add a Creative Expressions black gem swirl.
And that's it - a nice and simple one!
Mel xxx
And that's it - a nice and simple one!
Mel xxx
Labels:
bird flourishes,
Creative Expressions,
gem swirls,
hat pins,
seedling nouveau,
spellbinders,
thoughtful sentiments,
vintage ribbon
Wednesday, 18 July 2012
Dance like no one is watching
This card was created using the new gorgeous stamp set from Creative Expressions - At the Ballet.
The sketchy ballet dancers are perfect to make cards for older and younger ladies alike.
I created an 8x8 inch card base in black and dotted the white Pearly pva glue around the edges and set aside to dry.
Taking a white 7x7 inch sheet of card, I chose two of the dies to fit my ballerina and sentiment from the Spellbinders Labels Six set.
Along the bottom strip of the card (which has not been embossed), I stamped a row of ballerinas in clear Versamark. I embossed them with clear powder to create resist.
I covered the whole sheet with Spun Sugar Distress Stain
which highlights the embossing and the ballerinas.
Taking the Spellbinders labels again, I cut and mounted frames for the ballerina and the sentiment, embossing them with the Creative Expressions Floral embossing folder.
Taking another sheet of white card, I laid the die cut sheet over the top and marked in pencil the position of the two apertures.
Once the two images were stamped in the apertures, I positioned the dies and used them as a stencil to blend Spun Sugar distress ink around the edges. I mounted this sheet behind the embossed card using foam pads to give dimension.
After layering onto the card base, I decorated the front with the Creative Expressions Gem Swirls
and Zipper Roses
Hope you like it and enjoy playing with ballerinas!
Mel x
Pin It Now!
The sketchy ballet dancers are perfect to make cards for older and younger ladies alike.
I created an 8x8 inch card base in black and dotted the white Pearly pva glue around the edges and set aside to dry.
Taking a white 7x7 inch sheet of card, I chose two of the dies to fit my ballerina and sentiment from the Spellbinders Labels Six set.
Arranging the two dies onto my card, I ran them through the Grand Calibur. Then, keeping the dies in place, I embossed the card with the Adagio embossing folder - running it through the machine twice to cover the width of the card.
Along the bottom strip of the card (which has not been embossed), I stamped a row of ballerinas in clear Versamark. I embossed them with clear powder to create resist.
I covered the whole sheet with Spun Sugar Distress Stain
which highlights the embossing and the ballerinas.
Taking the Spellbinders labels again, I cut and mounted frames for the ballerina and the sentiment, embossing them with the Creative Expressions Floral embossing folder.
Taking another sheet of white card, I laid the die cut sheet over the top and marked in pencil the position of the two apertures.
Once the two images were stamped in the apertures, I positioned the dies and used them as a stencil to blend Spun Sugar distress ink around the edges. I mounted this sheet behind the embossed card using foam pads to give dimension.
After layering onto the card base, I decorated the front with the Creative Expressions Gem Swirls
and Zipper Roses
Hope you like it and enjoy playing with ballerinas!
Mel x
Pin It Now!
Labels:
adagio,
at the ballet,
ballerinas,
Creative Expressions,
gem swirls,
labels six,
pearly glue,
spellbinders,
zipper roses
Thursday, 2 February 2012
You Make My Heart Flutter!
This week I have been working on my submission for the CRAFT Colour Combo challenge.
I found this colour scheme quite a challenge as it is not a pallet I would usually use - which makes it all the more fun!
Here is the card I submitted:
I used the carriage silhouette stamp from Clarity
mounted onto a Spellbinders Labels Fourteen die cut
and layered onto two Heart Squares dies set at an angle:
I cut some of the flourishes off the tag to fit it onto the card.
The card is embellished using Spellbinders Foliage
and Rose Creations
When matting and layering the card, I rolled back the cerise layer to reveal the orange colour on the reverse. I glued the rolled paper into place using Cosmic Shimmer Dries Clear Glue - although you do need to hold it in place for a minute or two to ensure that the rolls don't unfold!
The corners of the card are decorated with gems
And not a ribbon in sight!!
I hope you like it!
Mel xxx Pin It Now!
I found this colour scheme quite a challenge as it is not a pallet I would usually use - which makes it all the more fun!
Here is the card I submitted:
I used the carriage silhouette stamp from Clarity
mounted onto a Spellbinders Labels Fourteen die cut
and layered onto two Heart Squares dies set at an angle:
I used the Adagio embossing folder for the background:
The sentiment is from the Creative Expressions Thoughtful Sentiments stamp set:
and has been die cut using Fancy Tags Two
The card is embellished using Spellbinders Foliage
and Rose Creations
When matting and layering the card, I rolled back the cerise layer to reveal the orange colour on the reverse. I glued the rolled paper into place using Cosmic Shimmer Dries Clear Glue - although you do need to hold it in place for a minute or two to ensure that the rolls don't unfold!
And not a ribbon in sight!!
I hope you like it!
Mel xxx Pin It Now!
Sunday, 1 January 2012
Vintage Dressmaker
This week we are entered a card into the Top Tip Tuesday blog challenge.
The theme was "Anything Goes" so a chance to try something different.
This is my entry:
I used one of the new Couture Creations embossing folders - Vintage Dressmaker:
I embossed the image three times on different coloured card, cut the images out, inked them and layered them up.
The background papers were embossed using the Replacements embossing folder:
I embellished the card using Black Vintage Ribbon:
Quite a different card for me style-wise - hope you like it!
Mel x Pin It Now!
The theme was "Anything Goes" so a chance to try something different.
This is my entry:
I used one of the new Couture Creations embossing folders - Vintage Dressmaker:
I embossed the image three times on different coloured card, cut the images out, inked them and layered them up.
The background papers were embossed using the Replacements embossing folder:
I embellished the card using Black Vintage Ribbon:
And some black gem swirls:
Quite a different card for me style-wise - hope you like it!
Mel x Pin It Now!
Subscribe to:
Posts (Atom)


.jpg)


.jpg)