Showing posts with label that special touch of mica. Show all posts

Friday, 6 July 2012

Grand Ovals


Having tried these Grand Nestabilities I am amazed as to how quick they are to layer up to make an amazing card.

They work especially well if you are using a favourite stamp which you intend to paint or colour and present as a piece of art.


For this example I cut out 6 Spellbinders Grand Ovals in descending sizes in cream and red card stock.


On the red base oval, I used some of the Edgeabilities, but you can use a punch to get this decorative edge.

 After I fixed the base red layer on top of one of the cream layers I set about making my easel card. 

Make a crease 1 inch from the bottom and another 3 inches from the top and bend in opposite directions - this will give you your easel. Attach the 1 inch fold to the top of the red and cream base layer. Then fix the bottom half of the next red layer to the easel. 
Build your layers on to the card front. 

I embossed one of the layers with the Special Touch Mica Mask – Leaves.


I stamped and embossed one of my favourite flowers, Amaryllis.
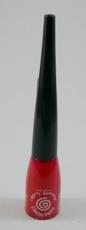
I then painted it with the luscious Cosmic ShimmerDazzle Paint Poppy Blush and left to dry. 


Using Spellbinders tag; I painted around the edge to get a perfect colour match to my flower and stamped a small sentiment.
Inside I chose a couple of matching brads to keep the easel in position.
Enjoy!
Linda x

Pin It Now!

Tuesday, 19 June 2012

Fairy Glade

Our new set of That Special Touch masks have arrived in stock so I have been having some fun trying them out.
The new masks in stock are:
Meadow

Penny Farthing

Songbird


Steampunk


For this project, I used the Meadow mask.

I embossed some patterned paper, and inked it with Distress Inks to highlight the embossing.

Once this was matted onto some coordinating card, I stamped the sentiment (from Just Rite Vintage Floral Labels)

and die cut it with the lacey circle from Spellbinders Moroccan Accents

After drawing around the outside of the die on green card to create an extra layer, I mounted the sentiment onto the card with foam pads to add dimension.

We have the new range of coloured American Seam Binding in stock
I used the Sea Moss to create the ribbon bow behind the sentiment.

A strip of the Sea Moss was also wrapped around the bottom of the card. I cut a strip from the Moroccan Accents border die to overlay the ribbon.

The fairy and butterfly embellishments were cut from the patterned paper pack.

I hope you enjoy the new ribbons and masks!


Mel xxx

Pin It Now!

Wednesday, 30 May 2012

Messing with Masks - part 2


This card continues the masks theme. Although my terrible photography does not show it, the glittered background is made using the Dragonfly mask.


To make, take your card blank and matt and layer two coordinating sheets of patterned paper.

Cut a double sided adhesive sheet to fit 6x6 inches and peel off the cover from one side.
Lay your mask over the sheet and pour over the green glitter. Tap off the excess.
Remove the mask from the sheet to reveal the dragonflies.

Top tip - rub some soap on the back of your mask before you lay it on the adhesive sheet to stop it sticking permanently.

Pour over the pink glitter to fill in the dragonflies and tap off the excess. Matt onto some pink patterned card.

Stamp your sentiment (from the Just Rite Forever Friends set)


and die cut it with the coordinating Spellbinders Ribbon Tag


 While the card is still in the die, blend some ink around the edges. Thread through the plum ribbon


Die cut one of the Spellbinders Labels Fourteen

from patterned paper. On pink patterned paper, draw around the outside edge of your die. Cut out by hand to create a "faux nestie".

Matt and layer onto your glittered back ground using the Cosmic Shimmer clear glue to give a strong hold.
Layer your sentiment and ribbon on top, wrapping the ribbon behind your glittered background.
Die cut some leaves from the Spellbinders Foliage set


 and use to embellish the sentiment with the Crimson Cloud paper roses.

Die cut two Spellbinders Fleur de Lis Squares


from green cardstock. Cut each square into four and tape behind your glittered topper to create an ornate border.

Matt and layer onto your card using foam pads to give dimension.


Mel xxxx


Pin It Now!