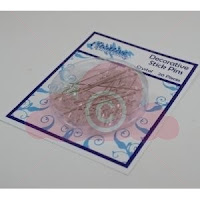
Showing posts with label crystal hat pins. Show all posts

Sunday, 2 September 2012

Christmas Greetings from around the World


This year Crimson Cloud brought out this beautiful Language Background Stamp which says Merry Christmas in languages from all around the world from Japan to Africa - this is surely what Christmas is about?


I used it to make this scroll card here’s how:

Stamp and emboss the Language Background stamp in onto a piece of card stock much wider than the stamp with enough excess card to make the scroll ends. Age with a little of Tim Holtz’s Stormy Sky Distress Ink.  Attach Blue Wrinkled Edge Ribbon to the both ends of the card and roll the card  to create your scroll.


Glue in place with Cosmic Shimmer clear glue - you will only need to hold in place for a few seconds to allow the glue to hold.

Cut out two Spellbinders Fleur DeLis Rectangles  


and overlap and glue in the centre. This you will lay onto a piece of cardstock embossed using Creative Expressions Crackle Folder


This should also be ‘aged’ with Stormy Sky. 

Tap your Versamark ink pad over the scroll and rolled edges and sprinkled with some crystal embossing powder. Heat to ‘glaze’ the background sheet and highlight some of the scrolls. 

Layer up using mounting tape arrange your Blue Wrinkled Edge Ribbon and secure with Crystal Hat Pins from Creative Expressions. 


A few gem stones to decorate the glittered cardstock and you are there - your own "Starry, Starry Night".

Linda x
Pin It Now!

Sunday, 8 January 2012

The Happy Couple

With Valentine's Day just around the corner, I made this card for the Gallery of the February edition of Craft Stamper - which is out now.

To create this card, stamp image using Penny Black's Bride and Groom

 and die cut with Spellbinders Heart Squares:


Create a “faux nestie” to back onto your image by drawing around the die and cutting out.


Stamp the image again onto patterned papers. Cut out the bride's dress and the groom's suit and attach to the original stamped image. Colour the remaining parts of the image.


To create a patchwork background, cut three sheets of patterned paper into 1 inch strips. Attach these side by side lengthways onto an A4 adhesive sheet. Turn the sheet 90 degrees and cut into one inch strips - so each strip has a column of 1 inch squares. Peel of the backing of the adhesive and stick the strips onto a piece of card. You can adjust the position of the strips to create a pattern you like.


Decorate with bow created using Creative Expressions Red Wrinkled Edge Ribbon,


Creative Expressions Crystal Hat Pins,


and button made using a Martha Stewart Embossed Button Punch


punched from patterned paper.


Matt and layer your image. 


Die cut another Heart Square from red card, cut into 4 to create corner accents. Use the “waste” hearts to decorate the edges of the card.


For a final decorative edge, use CosmicShimmer Teal Sky Pearly PVA Glue


 to make faux pearls.


Why not try making a patchwork sheet to give a new look to your projects?
Mel xx Pin It Now!

Monday, 28 November 2011

French birthday wishes

I made this card for my brother-in-law who has just moved to France:
I had great fun playing with the Spellbinders dies on this one - moving them around and layering them up until I was happy with the layout - using Labels Twenty :


The Paris scene was made using two Clarity Stamps - Victorian Miniatures Set

and the small Eiffel Tower


The scene was very quick and easy to do - I used a small circle to mask a "sun" and a tiny bit of Black Soot Distress Ink to ground the Tower and the Victorian Gentleman.

The sentiment is one of my favourite Penny Black stamps - it is so versatile!
I inked around the edge with a little Tea Dye Distress Ink to age it.

The background was embossed with the Creative Expressions Time embossing folder:

To embellish the card, I used the Creative Expressions Vintage Ribbon - Black  and Amber Brown:


The final touch, was to add some faux pearls around the edges using the shimmer pearlised black glue:


Thanks for looking!
Mel
xxx


Pin It Now!