Friday, 7 September 2012

Layers Challenge

This week we have entered the Allsorts blog challenge - the theme was "Layers"


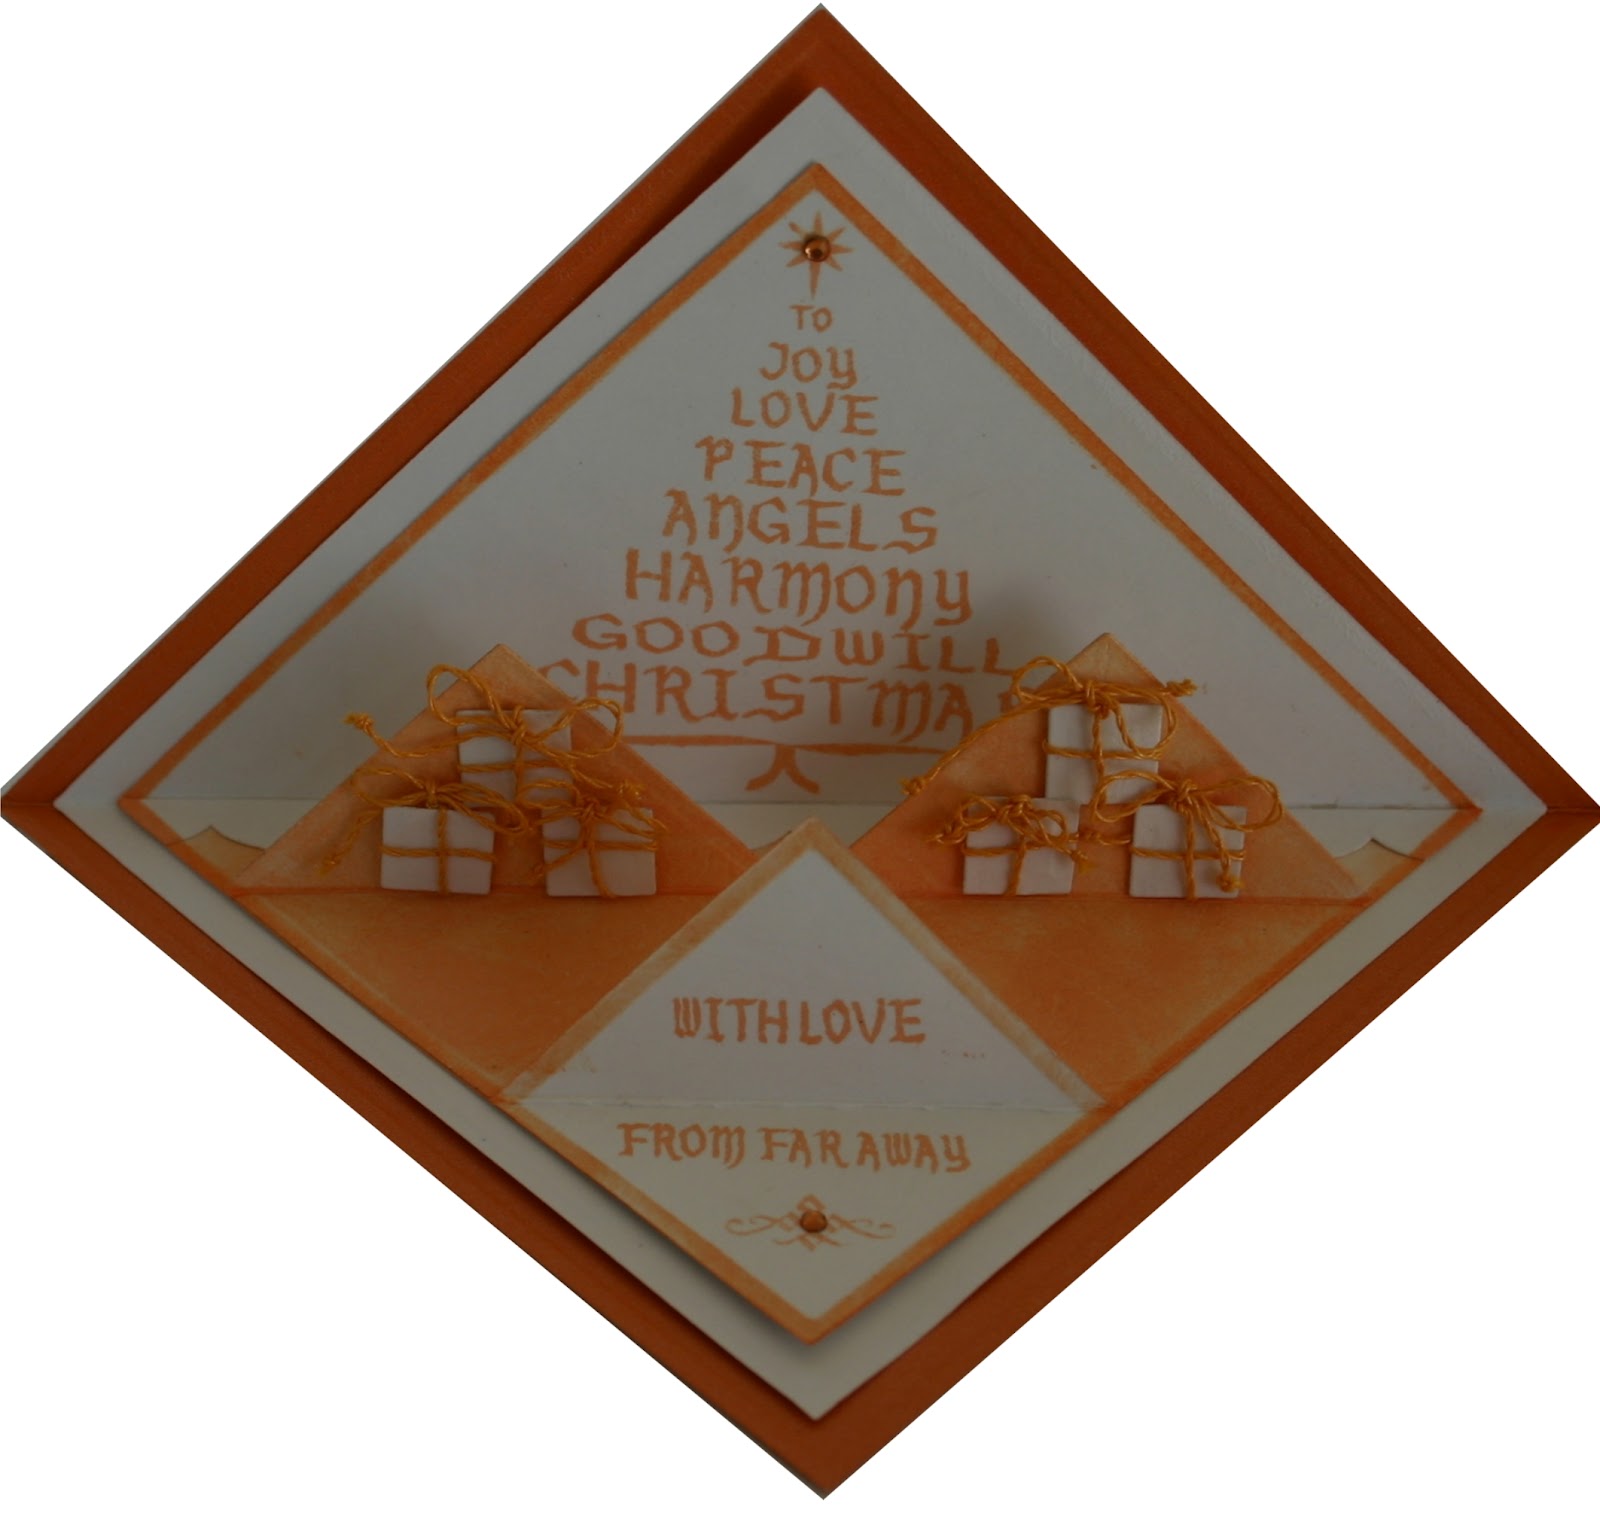
This cute little card was made with my daughter in mind, and all Mother and Daughters separated at Christmas time.

I cut three of squares in decreasing sizes using the Spellbinders Grand Squares.


Having folded all the squares in half to create triangles I set about blending one of the squares with Tim Holtz Dried Marigold Distress Ink and edged the reverse side. 


The card stock I used is textured so it gave a nice uneven look to it.  

I cut three more small squares (about 2 inches wide) and blended them with ink on the reverse and sides.

Using the tree from Crimson Cloud Script Trees Stamp Set 


and the Dried Marigold ink I stamped the top half of the third largest square which you see standing up. 

The three largest squares were layered together to create the card base.

Using the sentiments from the same stamp set I stamped “WITH LOVE – FROM FAR AWAY” on one of the 2 inch squares and attached the point of the triangle - making sure only to glue the bottom half.

The other two 2 inch folded squares were attached behind the greeting. I created some little parcels from card stock and tied them with string (tip: for the sake of your sanity, fix down with a sticky dot whilst you do this!).  The parcels were arranged and attached to the upright backs of the orange squares.

Along the crease, to increase the 3D effect I cut out a strip from Edgeabilities laid and glued behind the parcels.

On the outside of the card, I punched and attached a decorative border and embellished with gems.

With another sentiment from the set I stamped a tag with “Darling Daughter” once again with Dried Marigold and tied with more string – done!

My Darling Daughter unfortunately cannot have this little card now as she will have seen it!!
But I hope the rest of you enjoy it?

Linda xx
Pin It Now!

The Spellbinders Dies have landed!!!

The newest range of Spellbinders dies have landed at Crimson Cloud!
Here is just a taster of the new range xxxx


Pin It Now!

Wednesday, 5 September 2012

Joy and Peace


I think the design of this card must have been inspired by a trip to The Vatican some time ago which is actually where the little cherub on the bow comes from.

Using some of my very precious gold and silver flakes I covered a double sided sticky sheet which I fixed to an 8 x 7 card. 

Then using Crimson Cloud’s free SVG for September of the Arch Window, I cut out two arches on my Cricut - 


 scaled it to fit my Guardian Angel from the Crimson Cloud Guardian Angel Stamp Set. 


I stamped the smaller arch with the "Noel" stamp several times to create a background.

My Guardian Angel was stamped with Encore Ultimate Metalic Silver pad 


and embossed with Cosmic Shimmer Silver Shine Metallic embossing powder onto gold paper which I cut out carefully leaving a slight gold border to give depth. Then I layered them up using mounting tape.

I stamped the "Joy and Peace" sentiment from this set  onto a small tag using the same pad and powder. This in turn, I mounted onto a small rectangle to match the background of the arch and fixed a few metallic gems.  

With the "Glorious Christmas" sentiment also from the Guardian Angel Stamp Set I used Versamark to stamp the ribbon and embossed with the Silver Shine Metallic. Be quite quick with this as you must not let the ‘glue’ sink into the ribbon before you get the embossing powder on!


to place under my carefully draped ribbon and finally added my little cherub.

Very Vatican I thought?

Linda xx

Pin It Now!

Sunday, 2 September 2012

Christmas Greetings from around the World


This year Crimson Cloud brought out this beautiful Language Background Stamp which says Merry Christmas in languages from all around the world from Japan to Africa - this is surely what Christmas is about?


I used it to make this scroll card here’s how:

Stamp and emboss the Language Background stamp in onto a piece of card stock much wider than the stamp with enough excess card to make the scroll ends. Age with a little of Tim Holtz’s Stormy Sky Distress Ink.  Attach Blue Wrinkled Edge Ribbon to the both ends of the card and roll the card  to create your scroll.


Glue in place with Cosmic Shimmer clear glue - you will only need to hold in place for a few seconds to allow the glue to hold.

Cut out two Spellbinders Fleur DeLis Rectangles  


and overlap and glue in the centre. This you will lay onto a piece of cardstock embossed using Creative Expressions Crackle Folder. 


This should also be ‘aged’ with Stormy Sky. 

Tap your Versamark ink pad over the scroll and rolled edges and sprinkled with some crystal embossing powder. Heat to ‘glaze’ the background sheet and highlight some of the scrolls. 

Layer up using mounting tape arrange your Blue Wrinkled Edge Ribbon and secure with Crystal Hat Pins from Creative Expressions. 


A few gem stones to decorate the glittered cardstock and you are there - your own "Starry, Starry Night".

Linda x
Pin It Now!

Wednesday, 29 August 2012

Design Team Call at Creative Expressions

Creative Expressions have a design team call out at the moment and this is my entry.
The challenge was to include some texture into the project which I have achieved using the Creative Expression Bark embossing folder.

To start, I created a circle mask with a post it note, placed it onto white card and blended Dried Marigold and Tea Dye distress inks to create my background. Using the Creative Expressions Dandelion Wishes stamp set, I stamped the bird on the branch over the sun.


As where I stamped the bird was partially inked, I stamped it a second time and mounted it foam pads. I stamped the foliage background using second generation impression to create a lighter image, giving perspective.

Taking some Kraft cardstock, I embossed it with the Bark embossing folder to keep with the natural theme.

Taking a pen, I rolled the corner of the cardstock around the barrel to create a curl and glued it down with Cosmic Shimmer clear glue. I only had to hold it in place for a few seconds to allow the glue to set to give a very strong hold.

This embossed panel was laid over the bird scene, glued in place and the edges inked to highlight the embossing.

The sentiment was stamped and die cut using the Spellbinders Labels Eighteen

and I cut some Spellbinders Floral Flourishes and mounted them behind the sentiment.

The card was then simply matted and layered with some piercing around the edges.

Hope you like it!
Mel xxx Pin It Now!

Thursday, 23 August 2012

Glorious Christmas


I love this sentiment from the new Guardian Angel stamp set - I think it summarises all that Christmas should be!

This card is so quick and simple to make. Once I had die cut the Spellbinders Romantic Rectangles 


from white card, I embossed it using the Couture Creations Wild Poinsettia embossing folder -


making sure that I did not close the folder over the die.

I mounted the embossed panel onto a Kraft card base with mounting foam for dimension.

The sentiment was stamped onto a strip of white card and embossed with glittery gold embossing powder. I nipped the end of the strip with scissors to create a banner. The edges of the banner were inked with Versamark and embossed using the glittery gold embossing powder.

I took a length of American Seam Binding and tied it into a bow. Once I had snipped the tails, I inked them with Versamark and heat embossed them with the gold embossing powder.

I attached the sentiment to the card front with the ribbon bow, some twine and a button from my stash.

A very quick and easy Christmas card - great for batch making!

Mel xxxx Pin It Now!

Thursday, 16 August 2012

Have a Ball!


This week I have been exploring the versatility of the new Creative Expressions Kraft Paper Pads.

These are 6x6 inch pads in either Black/Ivory or Kraft/Black and can be coloured with distress inks, shimmer sprays, alcohol pens etc to perfectly match any project.

The paper in the packs is almost card weight so can take a lot of ink without tearing or breaking down.

For this Harlequin card, I started with the Ivory/Black pad - using a script pattern and a diamond pattern.

I inked both patterned papers with Wild Honey distress stain and set aside to dry.

I stamped my Harlequin onto cream card, coloured him in with copics and cut him out

On another piece of cream card, I stamped the sentiment  from the Venetian Mask stamp set
and die cut it using one of the Spellbinders Fancy Tags Two
and blended with Wild Honey Distress Ink while the card was still in the die.

From some black card stock, I die cut the largest Spellbinders Fleur De Lis rectangle


and the border from the Spellbinders Persian Accents set

I trimmed the border as I only wanted to use the narrow beaded strip.

I trimmed the script patterned paper to fit the inside of the fleur de lis rectangle.

On a black 6x6 card blank, I matted the diamond patterned paper and layered on the die cut shapes, Harlequin and sentiment.

The corners were decorated with Cosmic Shimmer black pearly glue


A fun party card I think!
Mel xxx Pin It Now!